Welcome to your journey into the world of JavaScript! If you’re a beginner looking to level up your web development skills, understanding the DOM (Document Object Model) is a must. Whether you’re aiming to create interactive web pages or simply curious about how JavaScript brings websites to life, this guide is for you. In this JavaScript DOM tutorial, we’ll break down what the DOM is, how it works, and how you can use it to manipulate web content with practical examples. By the end, you’ll have a solid foundation in DOM manipulation and be ready to experiment on your own.
What Is the Document Object Model (DOM)?
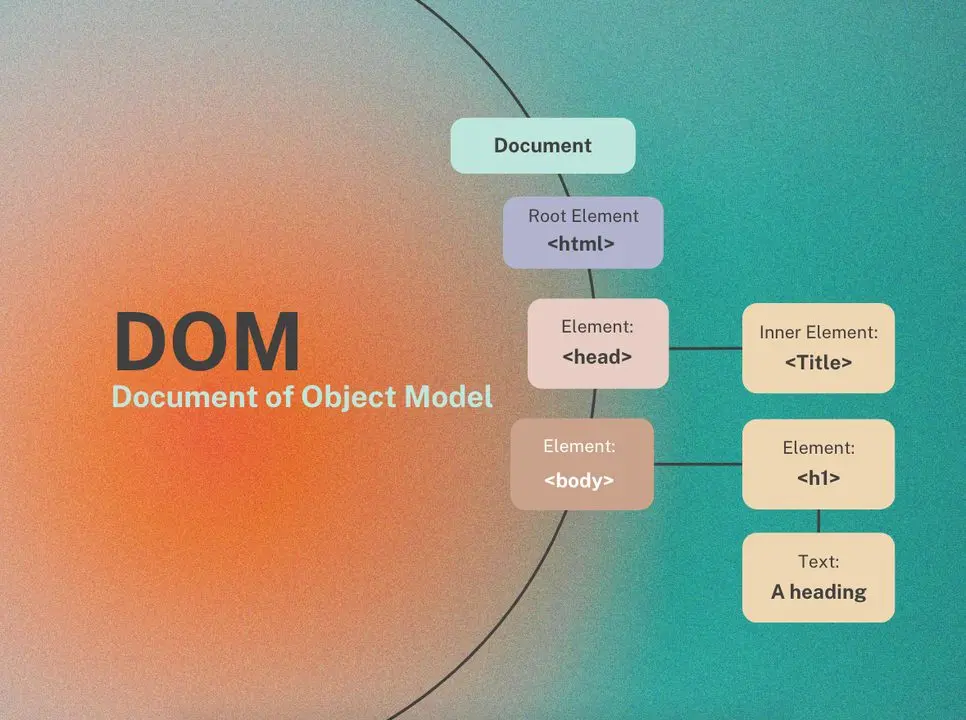
The Document Object Model, or DOM, is like a bridge between your HTML and JavaScript. It’s a programming interface that represents the structure of a web page as a tree of objects. When a browser loads an HTML file, it creates this tree—called the DOM tree—allowing JavaScript to interact with and modify the page’s content, structure, and style dynamically.
Think of the DOM as a blueprint of your webpage. Every element—like headings, paragraphs, images, and buttons—becomes a “node” in this tree. JavaScript can then access, change, or even remove these nodes, making your site interactive. This is why understanding the DOM is a cornerstone of JavaScript web development.
How Does the DOM Work?
When you open a webpage, the browser parses the HTML and builds the DOM tree. Here’s a simple example of HTML and its DOM representation:
<html>
    <head>
        <title>My Page</title>
    </head>
    <body>
        <h1>Hello, World!</h1>
        <p>This is a test.</p>
    </body>
</html>
In the DOM tree, this becomes:
html(root node)headtitle(with text “My Page”)
bodyh1(with text “Hello, World!”)p(with text “This is a test.”)
Each node is an object that JavaScript can manipulate. This hierarchical structure is what makes the DOM so powerful for learn JavaScript DOM enthusiasts.
Why Is Understanding the DOM Important?
For JavaScript for beginners, the DOM is your gateway to creating dynamic websites. Want to change a button’s text when clicked? Add a new paragraph? Hide an image? The DOM makes it possible. It’s the tool that turns static HTML into a living, breathing webpage. Plus, mastering DOM manipulation sets you up for more advanced topics like event handling and frameworks like React or Vue.
Getting Started with DOM Manipulation
Let’s dive into some practical examples. To interact with the DOM, you’ll use JavaScript methods and properties. Here are the basics you need to know.
1. Accessing DOM Elements
JavaScript provides several ways to select elements from the DOM:
getElementById(): Selects an element by its ID.getElementsByClassName(): Returns a list of elements with a specific class.querySelector(): Uses CSS selectors to grab the first matching element.querySelectorAll(): Returns all matching elements as a NodeList.
Here’s an example:
<html>
    <head>
        <title>My Page</title>
    </head>
    <body>
        <h1>Hello, World!</h1>
        <p>This is a test.</p>
    </body>
</html>
2. Changing Content
Once you’ve selected an element, you can modify its content using properties like innerHTML or textContent:
<body>
    <h1 id="title">Welcome</h1>
</body>

<script>
    const title = document.getElementById("title");
    title.textContent = "Hello, DOM!";
    // Now the h1 says "Hello, DOM!"
</script>
innerHTML lets you add HTML tags, while textContent is safer for plain text.
3. Modifying Styles
You can change an element’s appearance with the style property:
<body>
    <p id="intro">This is a paragraph.</p>
</body>

<script>
    const intro = document.getElementById("intro");
    intro.style.color = "blue";
    intro.style.fontSize = "20px";
</script>
4. Creating and Adding Elements
Need to add something new? Use createElement() and appendChild():
<body>
    <div id="container"></div>
</body>

<script>
    const container = document.getElementById("container");
    const newP = document.createElement("p");
    newP.textContent = "I’m new here!";
    container.appendChild(newP);
</script>
5. Removing Elements
To delete an element, use remove() or parentNode.removeChild():
<body>
    <div id="container">
        <p id="old">Goodbye!</p>
    </div>
</body>

<script>
    const oldP = document.getElementById("old");
    oldP.remove();
</script>
Practical Example: Building a Simple To-Do List
Let’s put it all together with a mini project. This to-do list lets users add tasks dynamically:
<body>
    <input type="text" id="taskInput" placeholder="Enter a task">
    <button onclick="addTask()">Add Task</button>
    <ul id="taskList"></ul>

    <script>
        function addTask() {
            const input = document.getElementById("taskInput");
            const taskText = input.value;
            if (taskText === "") return;

            const li = document.createElement("li");
            li.textContent = taskText;
            document.getElementById("taskList").appendChild(li);
            input.value = ""; // Clear input
        }
    </script>
</body>
Try it out! Type a task, click the button, and watch it appear in the list. This is the power of DOM manipulation in action.
Common Mistakes to Avoid
As you learn JavaScript DOM, watch out for these pitfalls:
- Accessing elements too early: Ensure your script runs after the DOM is loaded (use
window.onloador place scripts at the end ofbody). - Overusing
innerHTML: It can be slow and risky if user input isn’t sanitized. - Ignoring browser compatibility: Test your code across browsers.
Learn More About the DOM
Want to dive deeper? Check out the MDN Web Docs on the DOM for an official, detailed resource. It’s a goldmine for JavaScript web development learners.
Conclusion
Understanding the DOM is a game-changer for JavaScript for beginners. It’s your key to making web pages interactive and engaging. With the basics of selecting, modifying, and creating elements under your belt, you’re ready to experiment and build. Practice these skills, and soon you’ll be crafting dynamic websites with confidence.
Looking for more coding tips? Explore our Front-End Development tutorials for additional guides to boost your skills!


